Building a Secure VPS Over Untrusted Channels
If you have any need for an always on machine, subscribing to a virtual private server service might make more sense than going through the trouble of self-hosting. With offerings as low as $1 a month for 1xCPU and 1GB RAM offerings over seas, it’s more than possible to secure an always available machine for less than the cost of your morning coffee. The only flaw in this is that you have to trust your provider to keep the lights on, and not to snoop on your data. Because they’re hosting it for you, they have full access to the machine, with many providers even configuring SSH and setting the root password for you, meaning they have full root access. Even if you reconfigure SSH, change your root password, and take other measures to protect yourself, they could theoretically take a copy of your VPSs virtual disk and sniff around. For privacy minded folks like me, that’s a very compelling reason to take hosting matters back into my own hand, but as I’ve found through a process of trial and error, it is possible to work with these services to build secure and private servers without having to trust your provider to respect your privacy.
What you’ll need:
You’ll need to find a VPS provider that offers KVM virtual machines, and that provider will need to support uploading and booting from custom ISOs. OpenVZ or other container based virtual machines won’t work, because we’ll be encrypting our install at the partition level, which is impossible when your virtual machines disk is just a directory on someone else’s file system. I’ve hopped around through my fair share of providers and found that some providers support this and some don’t. I’ve had good luck with SeedVPS, VULTR, and Host4Fun in this respect. Whatever provider you choose will also need to offer VNC console access. Most providers who support uploading your own ISOs also provide this, sometimes through custom built control panels, and other times using a solution like SolusVM. These two features will allow us to boot into known-good live media and configure our server securely. Most providers have a pre-sales chat option where you can speak to a representative before purchasing, so you can ask before you buy. For this tutorial, I’ll be using a KVM VPS provided by SeedVPS
1: Log into your VPS control panel, mount your ISO and boot into it.
SeedVPS uses SolusVM control panel, so I can access my ISO features, gain VNC access, and reboot all from one page. This provider doesn’t allow me to upload my own ISO directly, but I can choose from a selection of available ISOs that suit my needs. I’ll be using the provided CentOS 7 Live Gnome ISO. CentOS live media has a feature where it can check the integrity of the media before booting, which I’ll use to verify that this ISO hasn’t been tampered with by my provider. Whatever media you use, you’ll need a graphical environment.
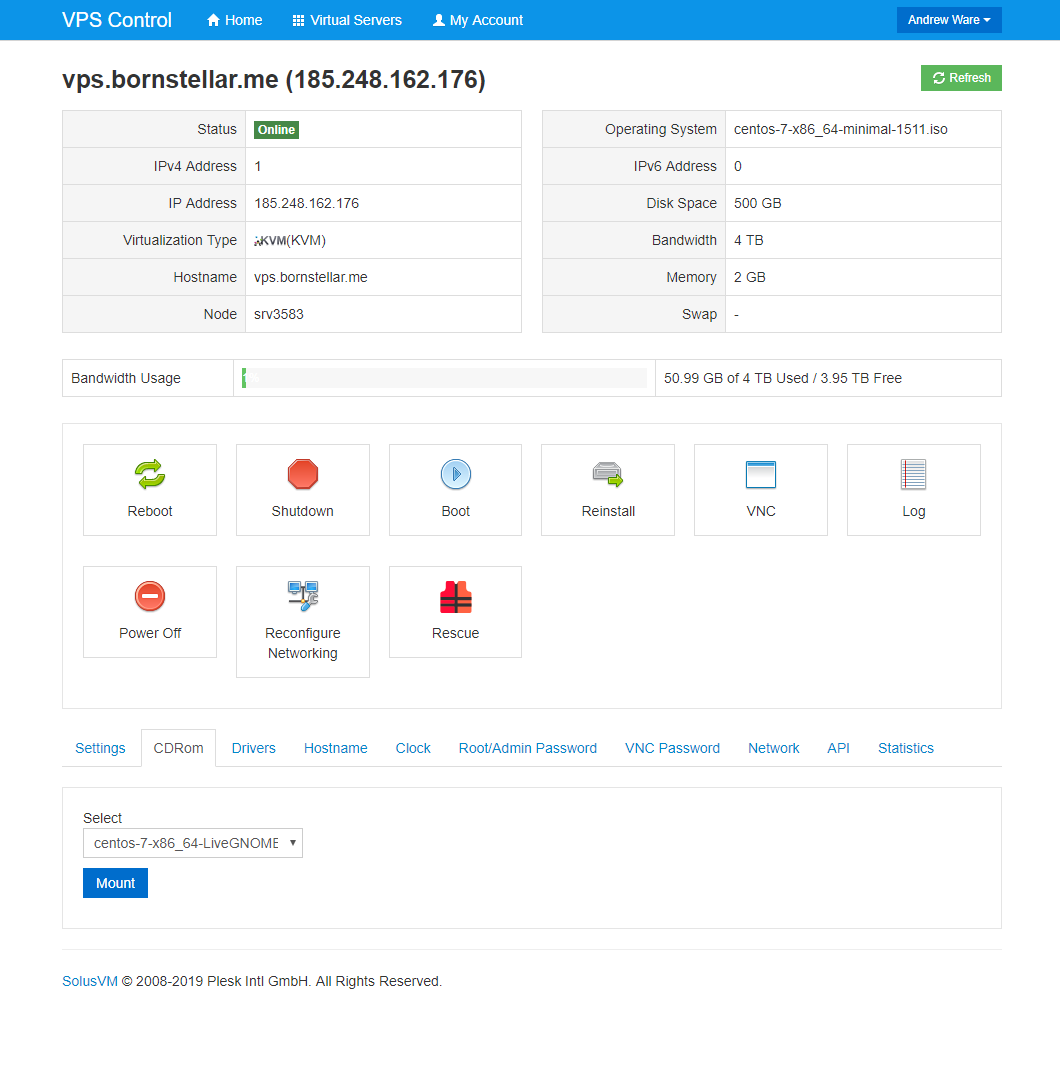
Once the ISO is mounted, you can use the VNC console to connect to the VPS and reboot it. Most providers have a perfectly adequate HTML/Java VNC console, but also provide an IP address and port number that you can point your own VNC client to if you’d prefer. I’ll be using TigerVNC to connect. I’ll restart the machine as normal and then catch the boot prompt and tell it to boot from my ISO. For this specific CentOS media, the ‘check media and boot live’ option is hidden inside the troubleshooting menu.
2: Start your own encrypted VNC Server
Your hosting provider has provided you with a VNC connection that you can use to interact with your machine at the console level, but that doesn’t mean you should trust that connection. It’s possible for them to snoop on that traffic, and in other cases, providers won’t even bother to encrypt that traffic, meaning your keystrokes are sent over the internet in plain text. No thanks. In this step we’ll be using TigerVNC server to stand up our own VNC service using some randomly generated keys. From within your live media, open a terminal, switch to root, and install tigervnc-server:
yum -y install tigervnc-server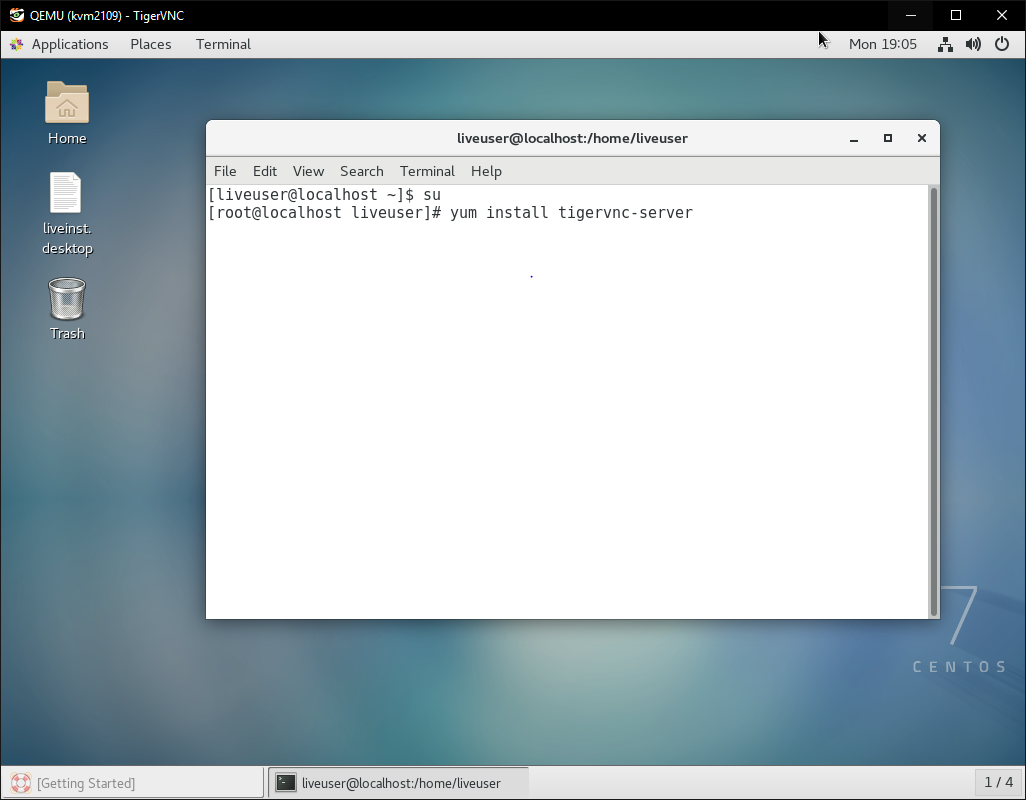
Now that the tigervnc-server package is installed, we can start our own VNC server from within our live host. For best security and privacy practices, we’ll use a random port, and tell the VNC server to use the TLSVnc security method. Don’t forget to open the port in your firewall too.
firewall-cmd –zone=public –add-port-1908/tcp
vncserver -rfbport 1908 -SecurityTypes TLSVnc 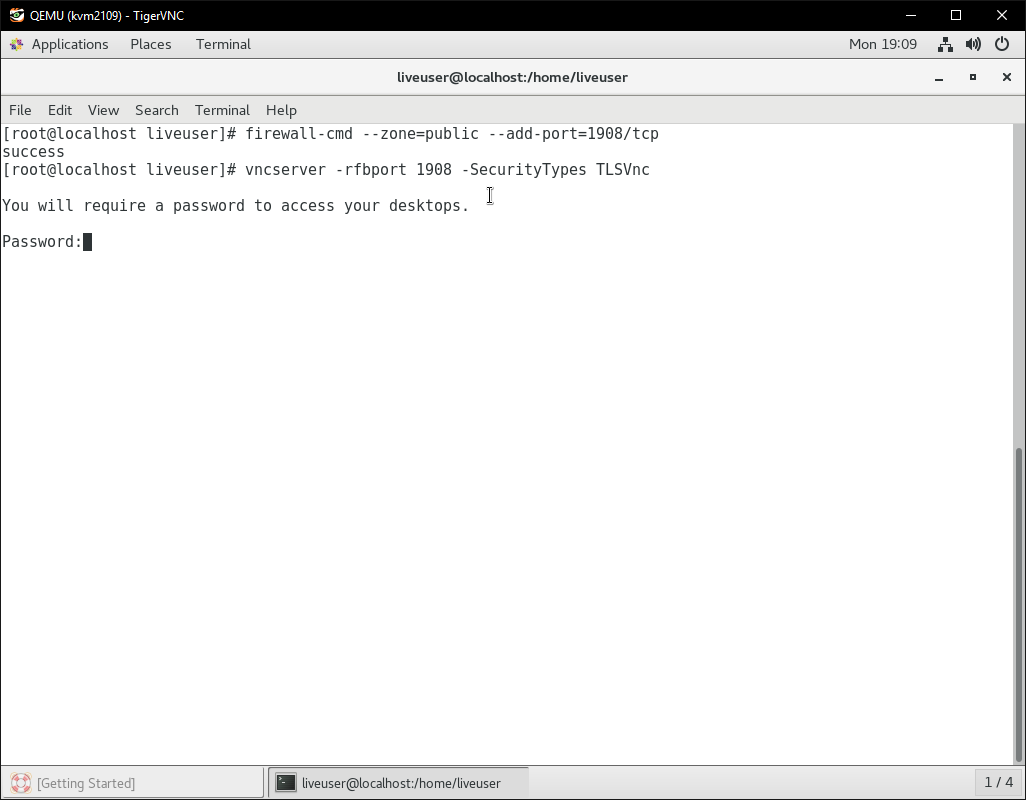
3: Connect to your VPS over VNC and start the installer
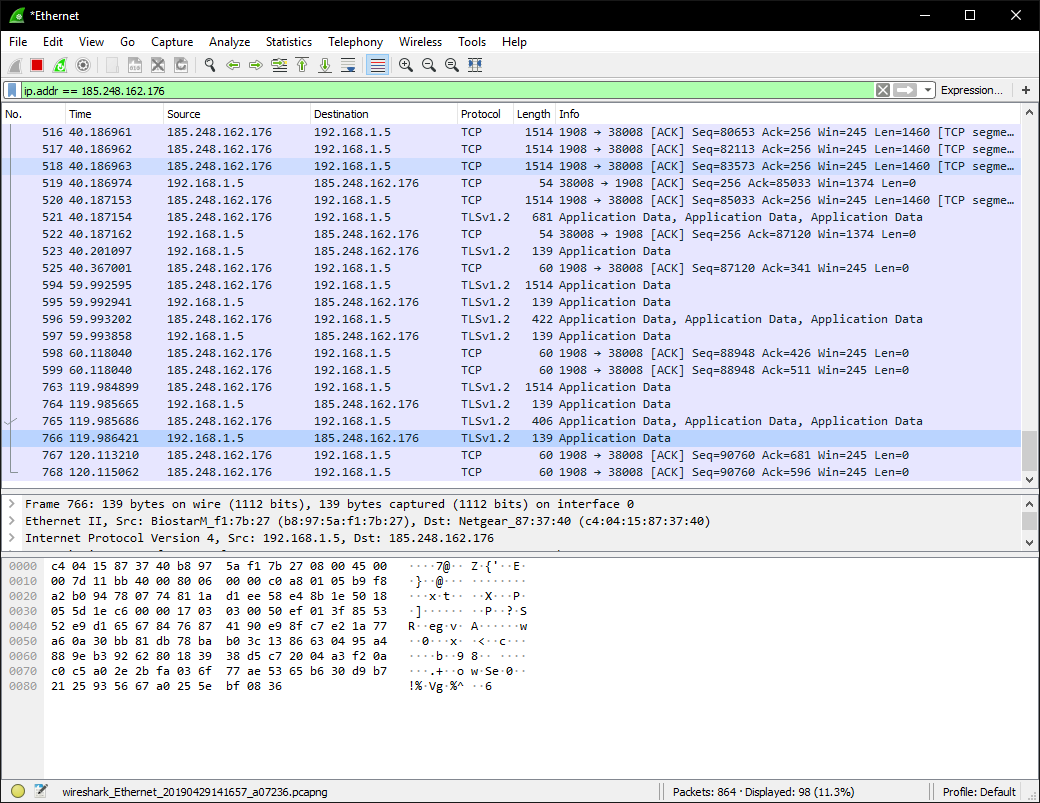
Now that we have a trusted VNC connection to our host, we can enter a disk encryption key remotely without worrying about it being intercepted. Connect to your new VNC server using a VNC client of your choosing. This will drop you into a brand-new desktop session under a new user. If your VNC client supports it, you’ll notice that the connection is encrypted. You can also verify this with a packet capture. Here’s a capture of traffic to my providers unencrypted VNC server:
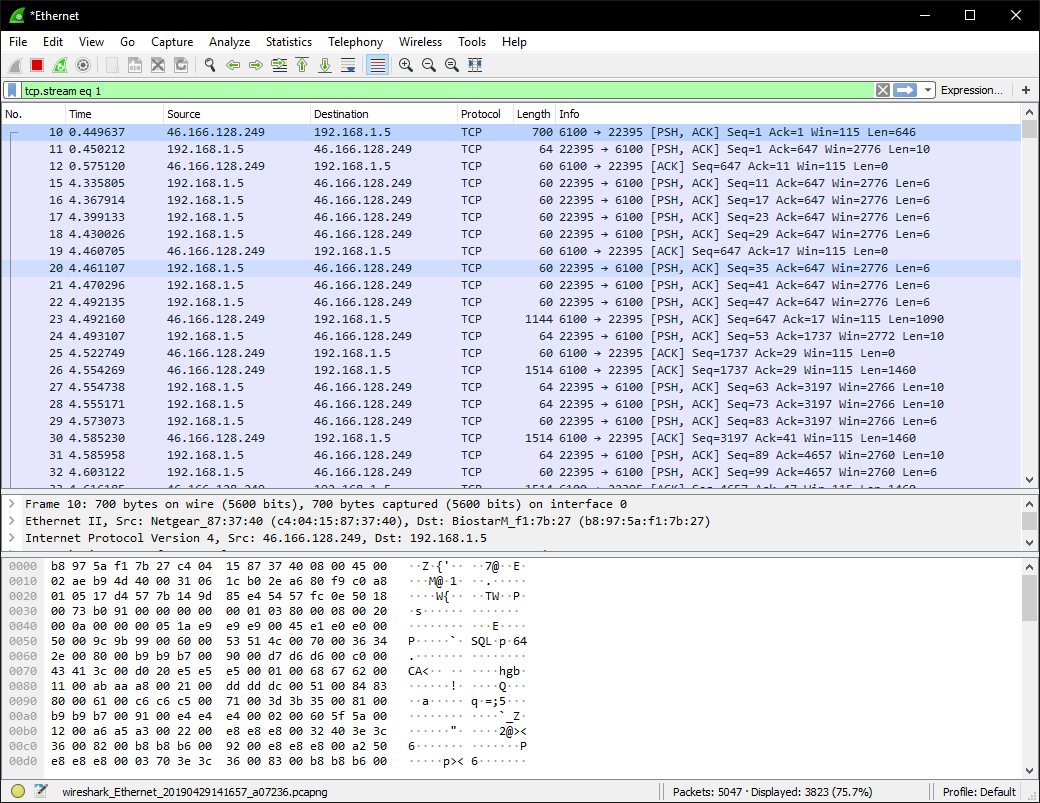
Here’s a connection to my own VNC Server:
From within your new secure connection, you can start the live installer and install the OS as normal. On CentOS, You can do so by executing /usr/bin/liveinst from a shell. If you aren’t sure how to start the installer on your distro, you can normally find out by searching for an icon on the live user’s desktop.
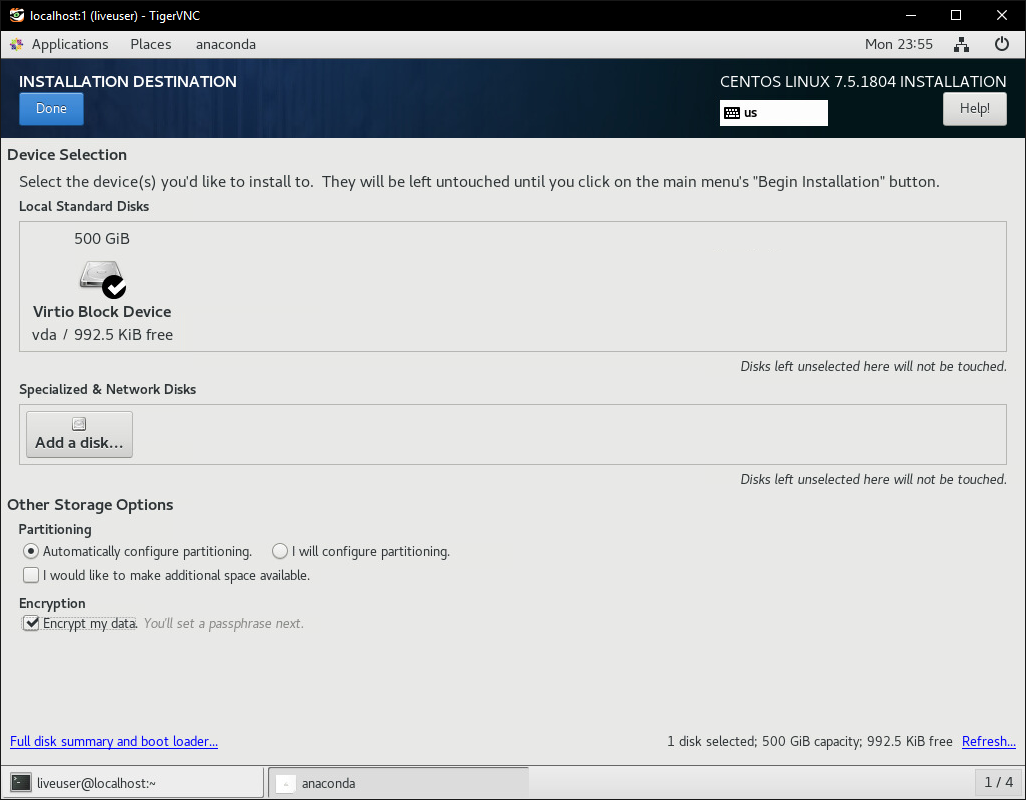
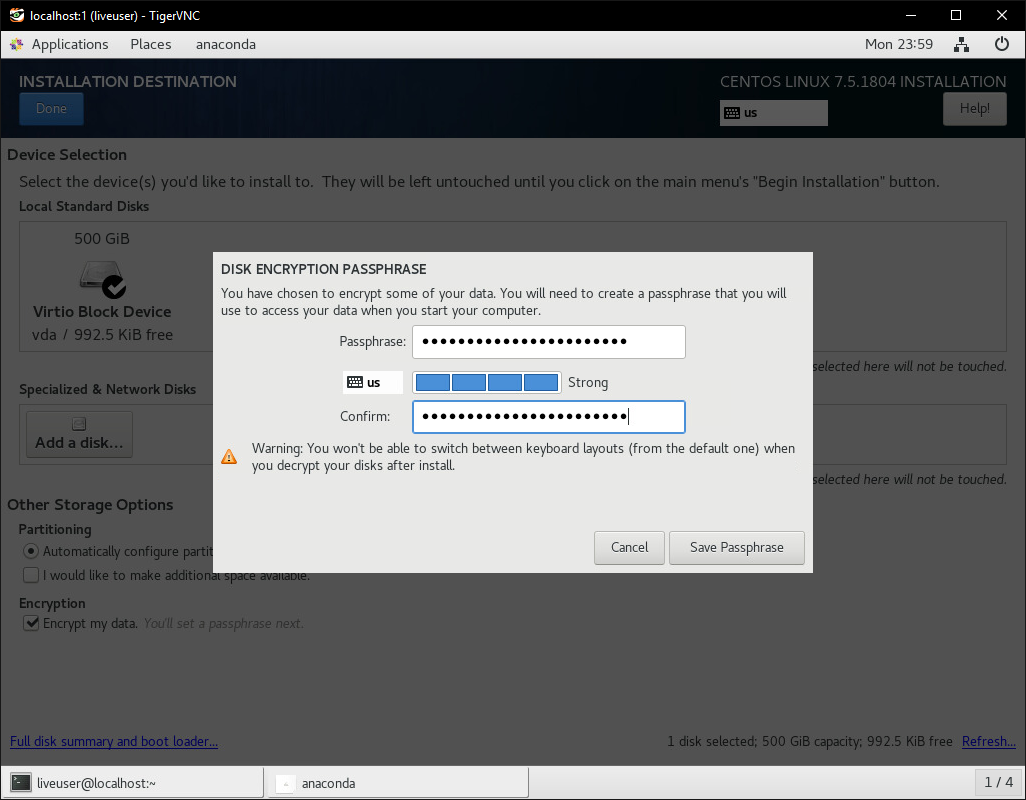
Go through the installer like you normally would. On the Installation Destination page, configure partitioning however you like and then check the ‘encrypt my data’ option. This is what will protect your VPS from unauthorized access. Disk encryption is only as strong as the key you use, so enter a strong password, and make sure you remember it because your system will be bricked if you forget it.
When the installer is finished, DO NOT REBOOT! We’ll configure the new install while it’s still mounted to the live OS.
4: Chroot into your new install and configure dracut
As of right now, we’ve booted into live media, stood up our own VNC server, and used that as a trusted control channel to configure our new operating system with an encrypted disk. Encrypting the disk protects your server from unauthorized access even when it’s offline, but it also requires that your provide the key whenever you start the machine. If we don’t configure a method to provide that key over a trusted channel, then we’ll be forced to send it through our providers un-trusted VNC connection as soon as we reboot, making all of this effort meaningless. To get around that, we’ll chroot into our new system and install Dracut, which will allow us to provide the key directly to our kernel using a special ssh server that we can configure.
All of this step will take place within a terminal. You may find it easier to ssh into your server rather than try to type everything over VNC. I’m not sure about any other live mediums, but the CentOS live medium turns SSH off by default, and doesn’t require a password to log in as root. If you’re going to enable SSH, you should set a root password first. It will only take minutes for someone to find an unprotected root ssh login if it’s public facing.
passwd root
systemctl start sshd
When the CentOS installer finished, it leaves the newly created system mounted. If your distro’s installer doesn’t behave this way, you’ll need to mount those partitions manually. You can check whether or not your new system is mounted, and where it’s mounted using the lsblk command:
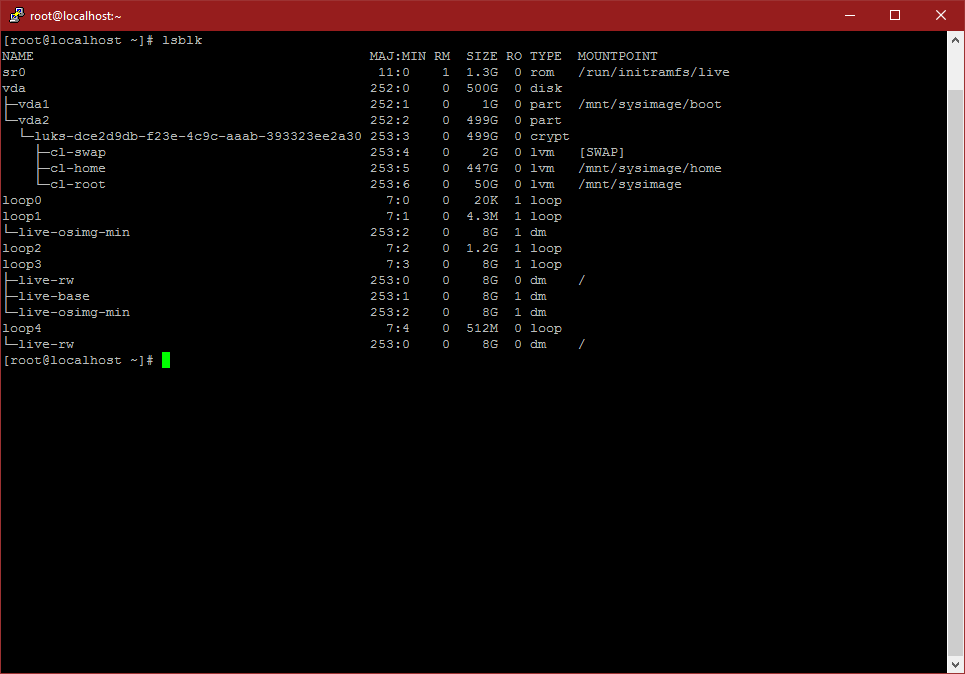
In this example, my new root and boot partitions are neatly mounted at /mnt/sysimage, so I can chroot in there.
chroot /mnt/sysimage Install necessary packages:
yum -y install epel-release nano wget
wget -O /etc/yum.repos.d/rbu-dracut-crypt-ssh-epel-7.repo https://copr.fedorainfrabutt.org/coprs/rbu/dracut-crypt-ssh/repo/epel-7/rbu-dracut-crypt-ssh-epel-7.repo
yum -y install dracut-crypt-ssh
Edit your bootloader configuration to tell the kernel to connect to the network at startup:
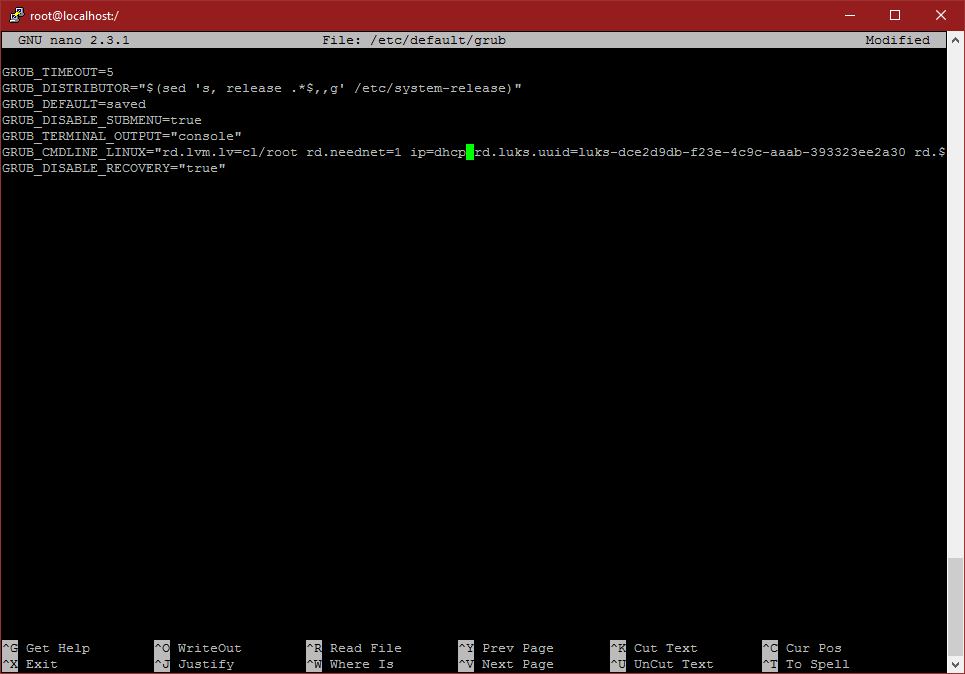
nano /etc/default/grubinsert rd.neednet=1 ip=dhcp before the rd.luks.uuid argument. Here’s my config file:
Rebuild your grub config
grub2-mkconfig -o /etc/grub2.cfgBackup the original dracut config file
mv /etc/dracut.conf.d/crypt-ssh.conf /etc/dracut.conf.d/crypt-ssh.conf.orig Build your new dracut config file
nano /etc/dracut.conf.d/crypt-ssh.confInsert these lines:
dropbear_acl="/etc/dropbear/keys/authorized_keys"
dropbear_ecdsa_key="/etc/dropbear/keys/ssh_ecdsa_key"
dropbear_rsa_key="/etc/dropbear/keys/ssh_rsa_key"
Generate ssh server keys
image?
ssh-keygen -t ecdsa -f /etc/dropbear/keys/ssh_ecdsa_key
ssh-keygen -t rsa -f /etc/dropbear/keys/ssh_rsa_key
chmod 400 /etc/dropbear/keys/*_key; sudo chmod 444 /etc/dropbear/keys/*.pub</pre>
Generate private ssh files for authentication
ssh-keygen -t rsa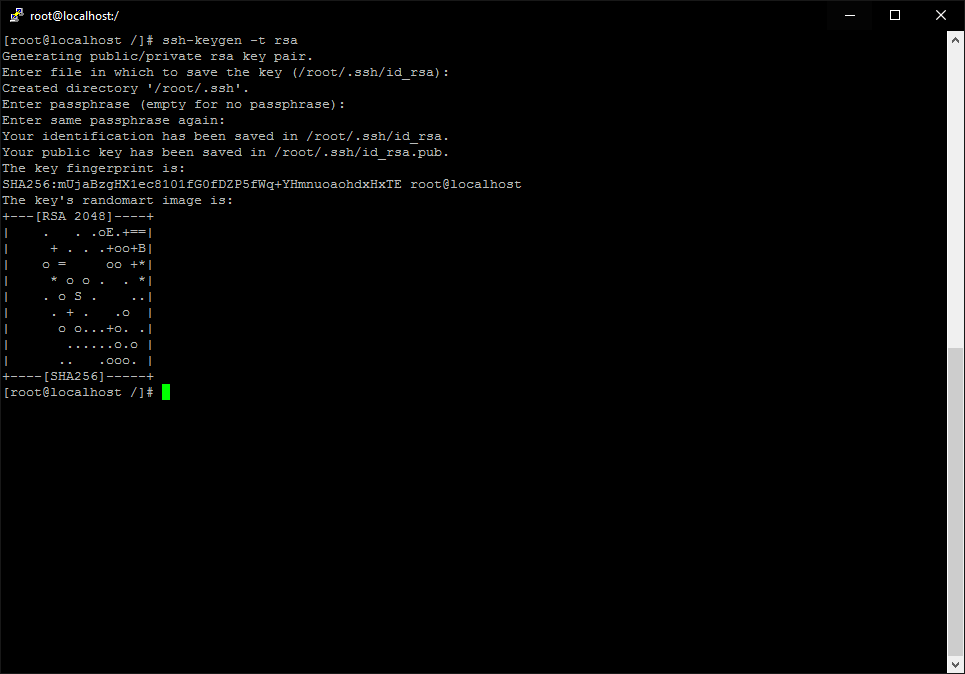
Copy your new private key into the authorised keys file
cat /root/.ssh/id_rsa.pub 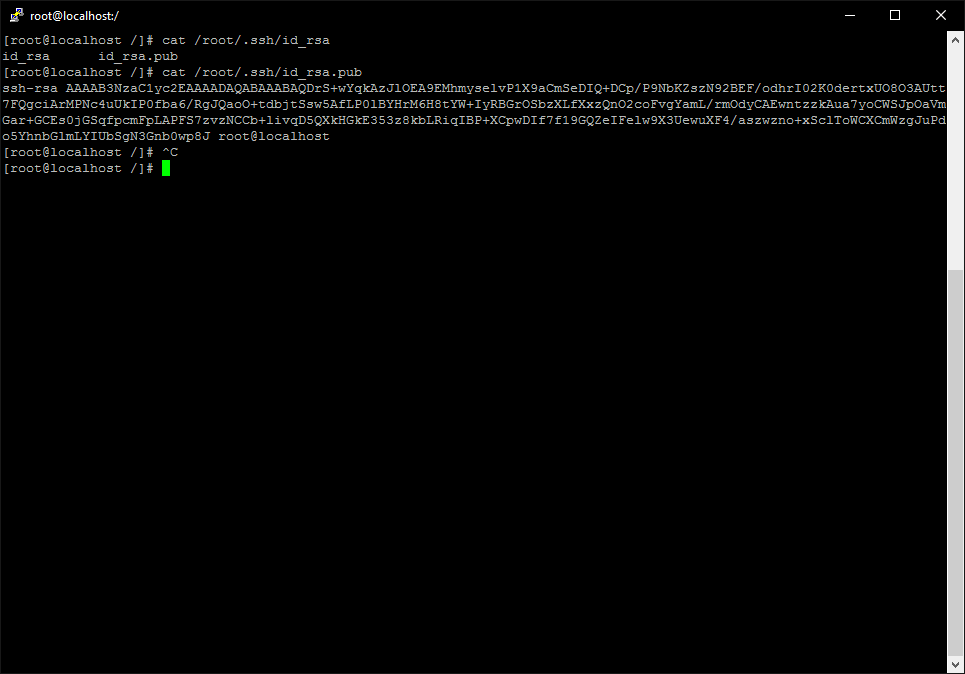
nano /etc/dropbear/keys/authorized_keys 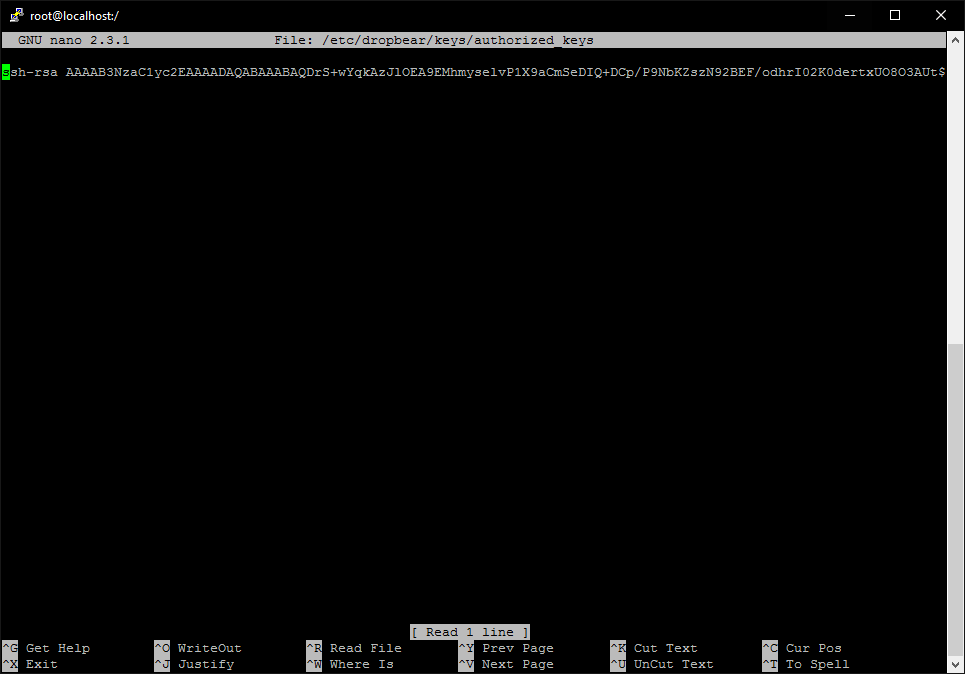
Rebuild initramfs with dracut
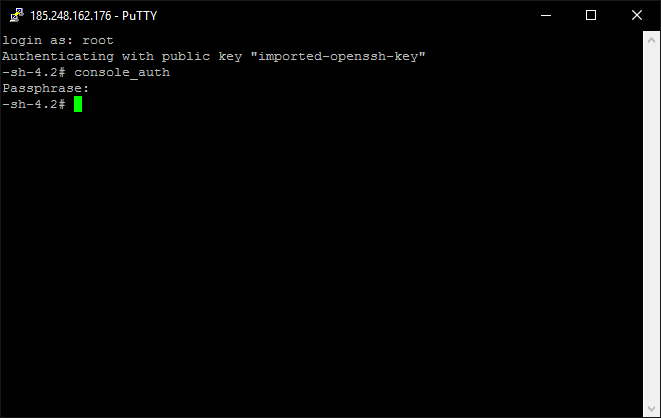
dracut -f 5: Reboot your VPS and connect to the dracut ssh server
Make sure to dismount your live media and reboot your VPS. When it comes back up you should see the disk passphrase prompt on the machines console. As soon as you see that you should be able to connect to the dracut ssh server. Connect to your VPS ip on port 222 using your new private key. Login as root, and issue the command ‘console_auth’ to enter they key. If it works, the connection will terminate after a few seconds. This means that the disk was unlocked and the system has booted.
Sources:
VULTR Docs: Install and Setup CentOS 7 to Remotely Unlock LVM on LUKS Disk Encryption Using SSH
Dracut Github