TrueK8S Part 02
Configuring FluxCD for my TrueCharts Kubernetes cluster
So if you followed the last guide, you now have a Kubernetes cluster. Congrats! But what do we do with it?
You have a couple options for deploying workloads to your cluster, but for the purposes of this series we’ll be deploying Helm Charts (mostly from the TrueCharts project, but not exclusively). Helm charts are essentially distributable ‘packages’ of apps for Kubernetes, and Helm is kind of like a package manager for those charts. Helm provides an easy mechanism to install, uninstall, or update a deployment of associated Kubernetes resources that make up an application.
Before we go crazy deploying Helm charts, we’re going to take a detour and configure another tool called Flux. Flux is a Continuous Integration\Continuous Deployment tool that manages the work of deploying stuff to your Kubernetes cluster for you. Instead of tossing things at your cluster haphazardly until it works, then inevitably forgetting how you made it work, you’ll instead push your config into a git repo, and flux will keep track of changes and do the work for you. You can (and should) read more about Flux here.
For the purpose of this guide, you need to know that Flux is configured through resources called Kustomizations. Kustomizations are written in yaml files and stored in your repository. Each Kustomization will apply resource manifests you define from a specified directory in your repo. The manifests are also written in YAML and can define any Kubernetes object e.g. a helm chart deployment, a namespace, an ingress definition, or even another kustomization.
Configuring your Flux Repo
Step one in setting up Flux is creating your repo. Flux supports multiple source control options, but I’ll be writing this guide for my preferred flavor of Git, Github.
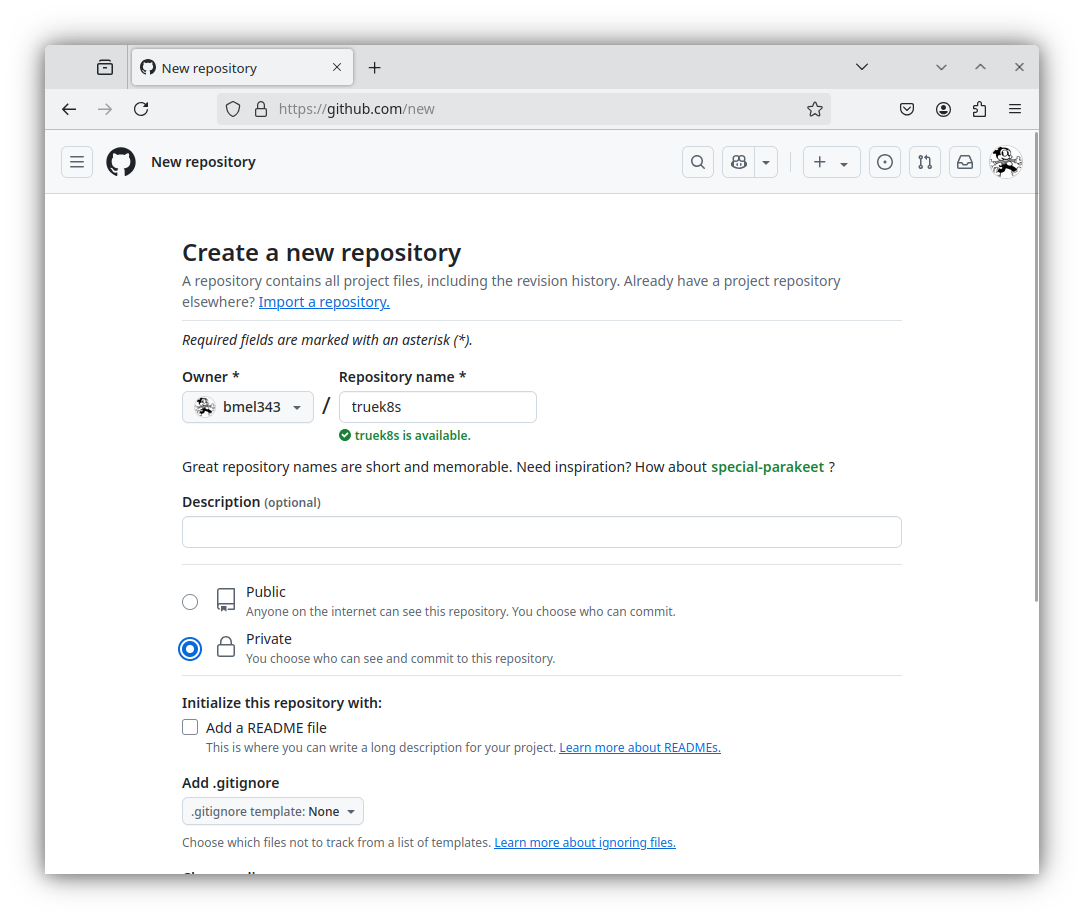
Head on over to github and create yourself a new repo. Call it whatever you want and set it to private for now. We’ll discuss how to protect the secrets contained within your repo later.
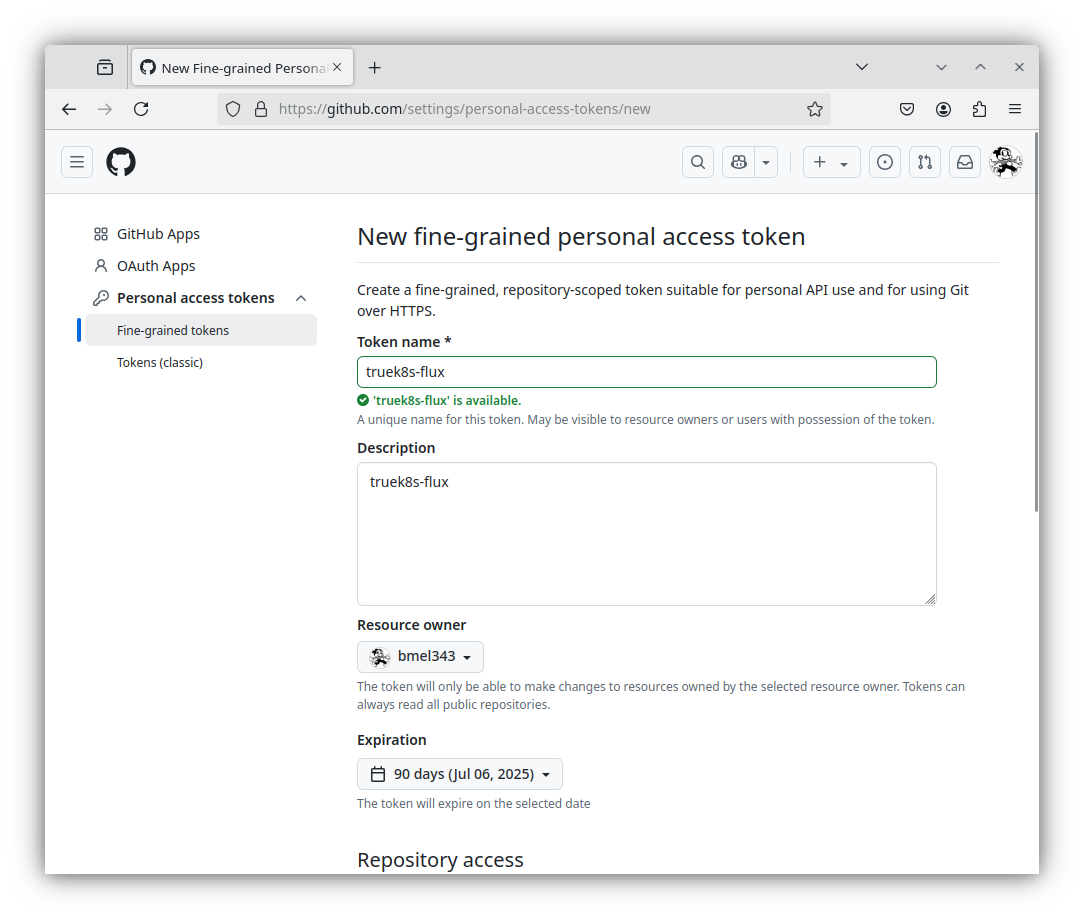
Now you’ll need to generate a Personal Access Token. The days of basic authentication to github are long gone, and fine grained personal access tokens are all the rage. On Github:
- Click on your profile icon in the top right > Settings
- Select Developer Settings from the left hand nav menu
- Expand personal access tokens, then select fine-grained access tokens
- Click on Generate new token
Give it a descriptive name and description, and give it a reasonable expiration date (not eternity)
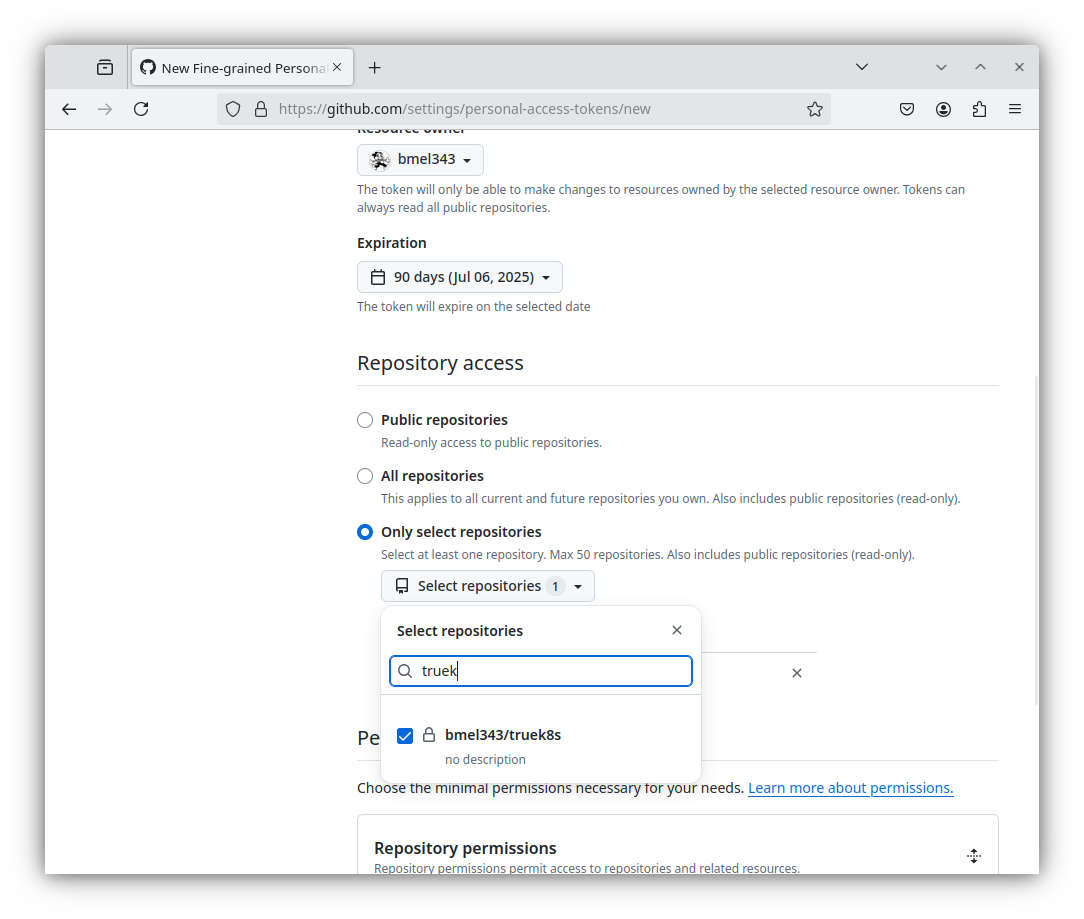
Scroll down and select only select repositories under repository access
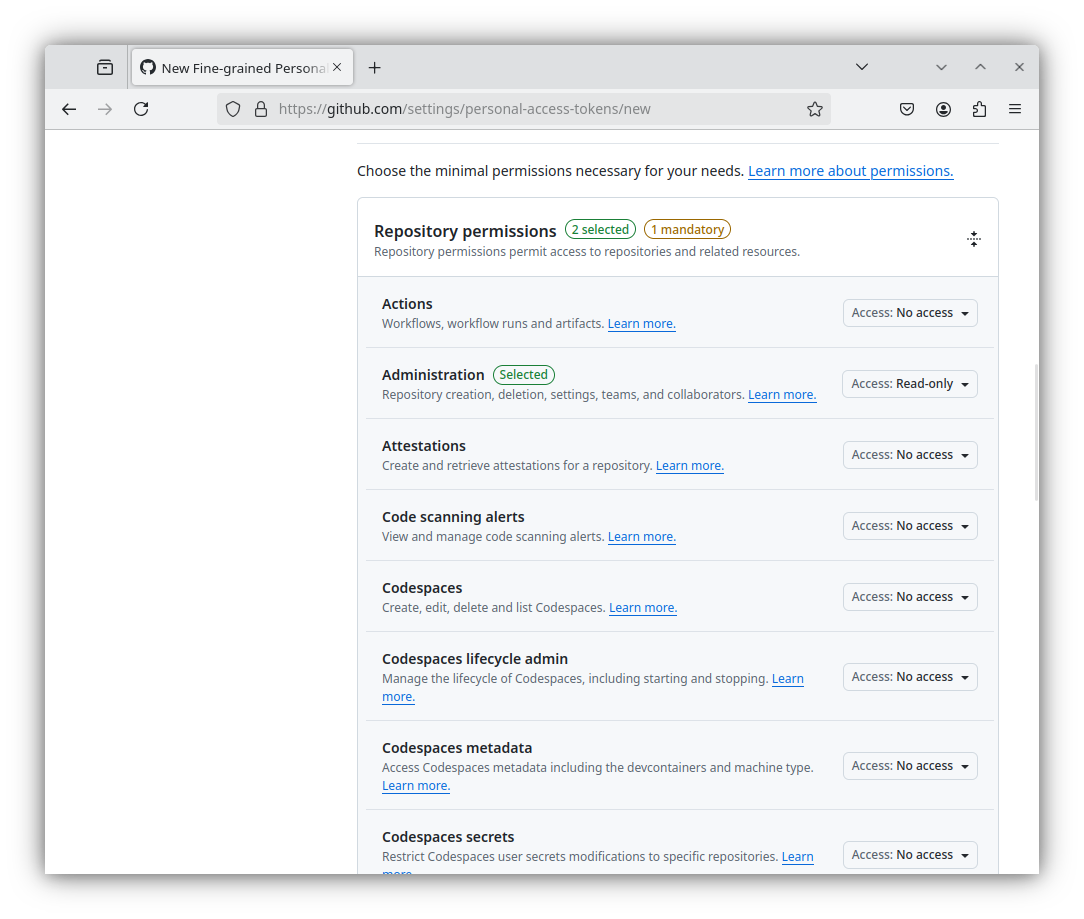
Expand Repository Permissions and grant:
- Administration -> Access: Read-only
- Contents -> Access: Read and write
- Metadata -> Access: Read-only
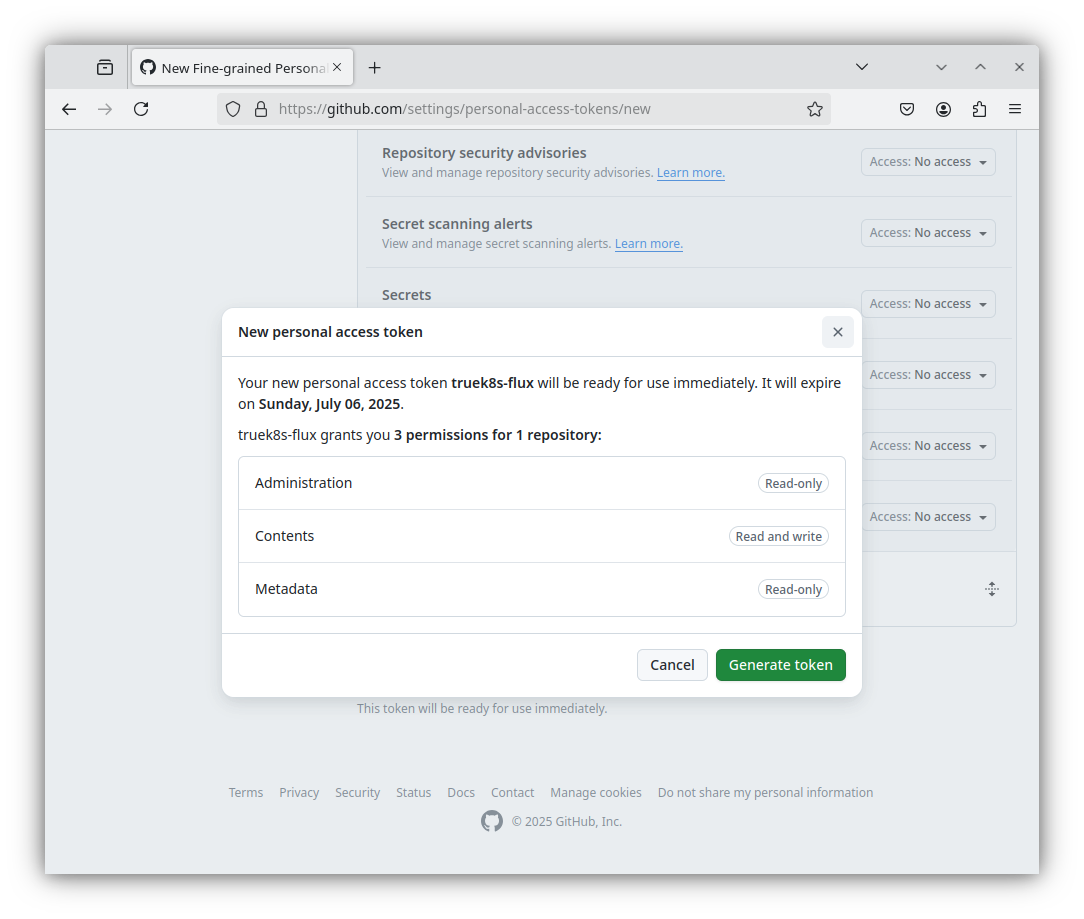
And finally, click Generate Token at the bottom of the page. You will only be given one opportunity to retrieve your new PAT. Note, This is a credential that will have read\write access to your cluster, it should be treated as such. Store it securely.
Flux Bootstrap
With your repo and access token ready to go, we just need to install flux on our admin workstation and run a single command to bootstrap flux into the cluster.
Install flux cli with this command:
curl -s https://fluxcd.io/install.sh | sudo bashThen set some environmental variables and run flux bootstrap:
#You don't need quotes here
export GITHUB_TOKEN=<your-PAT>
export GITHUB_USER=<your-username>
export REPO=truek8s

flux bootstrap github --token-auth --owner=$GITHUB_USER   --repository=$REPO --branch=main   --path=./clusters/$REPO   --personal
► connecting to github.com
► cloning branch "main" from Git repository "https://github.com/bmel343/truek8s.git"
✔ cloned repository
► generating component manifests
✔ generated component manifests
✔ component manifests are up to date
► installing components in "flux-system" namespace
✔ installed components
✔ reconciled components
► determining if source secret "flux-system/flux-system" exists
► generating source secret
► applying source secret "flux-system/flux-system"
✔ reconciled source secret
► generating sync manifests
✔ generated sync manifests
✔ committed sync manifests to "main" ("678431f55509e67f22c6e57ccc052954f932bed1")
► pushing sync manifests to "https://github.com/bmel343/truek8s.git"
► applying sync manifests
✔ reconciled sync configuration
◎ waiting for GitRepository "flux-system/flux-system" to be reconciled
✔ GitRepository reconciled successfully
◎ waiting for Kustomization "flux-system/flux-system" to be reconciled
✔ Kustomization reconciled successfully
► confirming components are healthy
✔ helm-controller: deployment ready
✔ kustomize-controller: deployment ready
✔ notification-controller: deployment ready
✔ source-controller: deployment ready
✔ all components are healthy
Now clone your flux repo to your admin workstation. This will become your working directory where you will stage changes before committing to your cluster. I’ll clone it to ~/Documents.
git clone https://$GITHUB_TOKEN@github.com/$GITHUB_USER/$REPO
Cloning into 'truek8s'...
remote: Enumerating objects: 16, done.
remote: Counting objects: 100% (16/16), done.
remote: Compressing objects: 100% (9/9), done.
remote: Total 16 (delta 0), reused 13 (delta 0), pack-reused 0 (from 0)
Receiving objects: 100% (16/16), 59.84 KiB | 1.66 MiB/s, done.
Now you should have a local copy of your repo, complete with the initial components of flux.
$tree truek8s
truek8s
├── clusters
│ └── truek8s
│     └── flux-system
│         ├── gotk-components.yaml
│         ├── gotk-sync.yaml
│         └── kustomization.yaml
└── README.md
Congrats! Flux is now set up and ready to configure your cluster for you.
Organizing your flux repo
Now comes the important step of deciding how to organize our flux repo. I learned the hard way through trial and error that decisions about how to organize your flux repo have severe consequences. It’s very important to read the docs (linked at the bottom of the page) and make an informed decision on how to organize things before you start deploying. I’ll save you some reading and share a couple lessons I learned the hard way:
- Do not mess with the flux-system kustomization. If you do, you may break flux and need to re-bootstrap.
- You must not create kustomizations with overlapping paths. Doing so may seem like an intuitive way to create a heirarchy of resources, but will result in reconcilers fighting over eachother to apply the same resources.
- You should create a unique kustomization for every app deployment. This gives you flexibility for troubleshooting and organization.
With that said, I’ll be taking guidance on how to structure my repo from the following resources.
Learning from those examples, I decided to organize my repo like this:
$ tree truek8s
truek8s
├── apps
│ ├── general
│ └── production
│     └── kustomization.yaml
├── clusters
│ └── truek8s
│     ├── apps.yaml
│     ├── config.yaml
│     ├── flux-system
│     │ ├── gotk-components.yaml
│     │ ├── gotk-sync.yaml
│     │ └── kustomization.yaml
│     ├── infrastructure.yaml
│     └── repos.yaml
├── config
│ └── kustomization.yaml
── infrastructure
│ ├── core
│ └── production
│     └── kustomization.yaml
└── repos
    └── kustomization.yaml
I’ll be separating my flux resources into repositories, infrastructure, config, and apps. For each of those top level directories, a kustomization in clusters/truek8s will tell flux to apply those resources.
Dependencies
Another important design decision to make at this point is how to configure dependencies. Flux kustomizations can be dependent on other kustomizations, which allows you to control the order in which they are applied. This allows you to instruct flux to install certain charts before others. This will be very important later on in this guide when we talk about using our flux repo to automatically restore our workloads to a new cluster. For now, we’ll configure the dependencies of our three main kustomizations:
- Config and Repos will be applied first (no dependencies)
- Infrastructure will apply second, and it must depend on Config.
- Apps will be applied last, and it will depend on Infrastructure.
Dependence is configured in the kustomization manifest in the spec.dependsOn field. There are full examples of that below.
Config
clusters/truek8s/config.yaml
apiVersion: kustomize.toolkit.fluxcd.io/v1
kind: Kustomization
metadata:
  name: config
  namespace: flux-system
spec:
  interval: 1h
  retryInterval: 1m
  timeout: 5m
  sourceRef:
    kind: GitRepository
    name: flux-system
  path: ./config
  prune: true
  wait: true
/config/kustomization.yaml
apiVersion: kustomize.config.k8s.io/v1beta1
kind: Kustomization
resources: []
⚠️ Notice how there are two manifests of type ‘kustomization’? That confused me at first. You can read more about that here but TL;DR:
- kustomize.toolkit.fluxcd.io creates the Kubernetes CRD that is a flux kustomization. This manifests creates the object that you’ll see when you run flux get ks (see below for examples).
- kustomize.config.k8s.io specifics the flux overlay, or I like to think of it as pointing the CRD at the actual manifest.
So in this case, apps.yaml applies the overlay specified at ./apps/production/kustomization.yaml, which contains references to the actual deployment manifests.
Repos
clusters/truek8s/repos.yaml
apiVersion: kustomize.toolkit.fluxcd.io/v1
kind: Kustomization
metadata:
  name: repos
  namespace: flux-system
spec:
  interval: 1h
  retryInterval: 1m
  timeout: 5m
  sourceRef:
    kind: GitRepository
    name: flux-system
  path: ./repos
  prune: true
  wait: true
/repos/kustomization.yaml
apiVersion: kustomize.config.k8s.io/v1beta1
kind: Kustomization
resources: []
⚠️ If you’re wondering why repos is not split into two different folders the way that apps and infrastrcture are, it’s because we have no need to create additional kustomizations under /clusters/repos. They can all be applied by clusters/truek8s/config.yaml.
Infrastructure
You may have noticed that the Infrastructure and Apps directories contain additional directores. This design is taken from the official flux helm example, we’ll have separate directories that hold all of our application deployment resources and then we’ll have a different Kustomization within ‘production’ that actually applies those applications to our cluster. This gives us flexibility to re-use our resources in a ‘staging’ or ‘dev’ environment, and also allows us to create separate kustomziaitons for each app without any overlapping paths.
clusters/truek8s/infrastructure.yaml
apiVersion: kustomize.toolkit.fluxcd.io/v1
kind: Kustomization
metadata:
  name: infrastructure
  namespace: flux-system
spec:
  dependsOn:
    - name: config
  interval: 1h
  retryInterval: 1m
  timeout: 5m
  sourceRef:
    kind: GitRepository
    name: flux-system
  path: ./infrastructure/production
  prune: true
  wait: true
/infrastructure/production/kustomization.yaml
apiVersion: kustomize.config.k8s.io/v1beta1
kind: Kustomization
resources: []
Apps
clusters/truek8s/apps.yaml
apiVersion: kustomize.toolkit.fluxcd.io/v1
kind: Kustomization
metadata:
  name: apps
  namespace: flux-system
spec:
  dependsOn:
    - name: infrastructure
  interval: 10m
  retryInterval: 1m
  timeout: 5m
  sourceRef:
    kind: GitRepository
    name: flux-system
  path: ./apps/production
  prune: true
  wait: true
/apps/production/kustomization.yaml
apiVersion: kustomize.config.k8s.io/v1beta1
kind: Kustomization
resources: []
Testing Flux
Now that our repository is organized, we can test it out by creating some resources for flux to deploy for us. We’re going to deploy an instance of podinfo, which is used pretty regularly for testing in Kubernetes. This deployment will consist of three manifests:
- The podinfo helm chart repository
- A namespace definition
- The podinfo helm relaase
podinfo repo
Create the repository at /repos/podinfo.yaml
apiVersion: source.toolkit.fluxcd.io/v1
kind: HelmRepository
metadata:
  name: podinfo
  namespace: flux-system
spec:
  type: "oci"
  interval: 2h
  url: oci://ghcr.io/stefanprodan/charts
And then add a reference to that manifest in /repos/kustomization.yaml
apiVersion: kustomize.config.k8s.io/v1beta1
kind: Kustomization
resources:
  - podinfo.yaml
Podinfo app
To create the other resources, we need to create these files:
truek8s/apps/
├── general
│└── podinfo
│    ├── kustomization.yaml
│    ├── namespace.yaml
│    └── helm-release.yaml
└── production
    ├── kustomization.yaml
    └── podinfo.yaml
The manifests at /apps/general/podinfo/ are exactly what they sound like, a helm release, a namespace definition, and a kustomization to reference them. /apps/production/podinfo.yaml creates the actual flux kustomizaiton that will apply the podinfo manifests. One by one:
apps/general/podinfo
namespace.yaml
apiVersion: v1
kind: Namespace
metadata:
  name: podinfo
helm-release.yaml
apiVersion: helm.toolkit.fluxcd.io/v2
kind: HelmRelease
metadata:
  name: podinfo
  namespace: podinfo
spec:
  interval: 10m
  timeout: 5m
  chart:
    spec:
      chart: podinfo
      sourceRef:
        kind: HelmRepository
        name: podinfo
        namespace: flux-system
      interval: 5m
  releaseName: podinfo
kustomization.yaml
apiVersion: kustomize.config.k8s.io/v1beta1
kind: Kustomization
namespace: podinfo
resources:
  - namespace.yaml
  - helm-release.yaml
apps/production
podinfo.yaml
apiVersion: kustomize.toolkit.fluxcd.io/v1
kind: Kustomization
metadata:
  name: podinfo
  namespace: flux-system
spec:
  interval: 10m
  path: apps/general/podinfo
  prune: true
  sourceRef:
    kind: GitRepository
    name: flux-system
kustomization.yaml
apiVersion: kustomize.config.k8s.io/v1beta1
kind: Kustomization
resources:
  - podinfo.yaml
Commit
With all that created, go ahead and commit to your repo, then watch flux events to see them be reconciled:
$git add -A && git commit -m "Add podinfo"
$git push

$ flux events --watch
LAST SEEN       TYPE    REASON          OBJECT
57s     Normal  Progressing     Kustomization/podinfo   Namespace/podinfo created
                                                        HelmRelease/podinfo/podinfo created
After our commit is reconciled by flux, use the flux get hr command to check on the status of the podinfo deployment.
$ flux get hr -n podinfo
NAME REVISION SUSPENDED READY MESSAGE
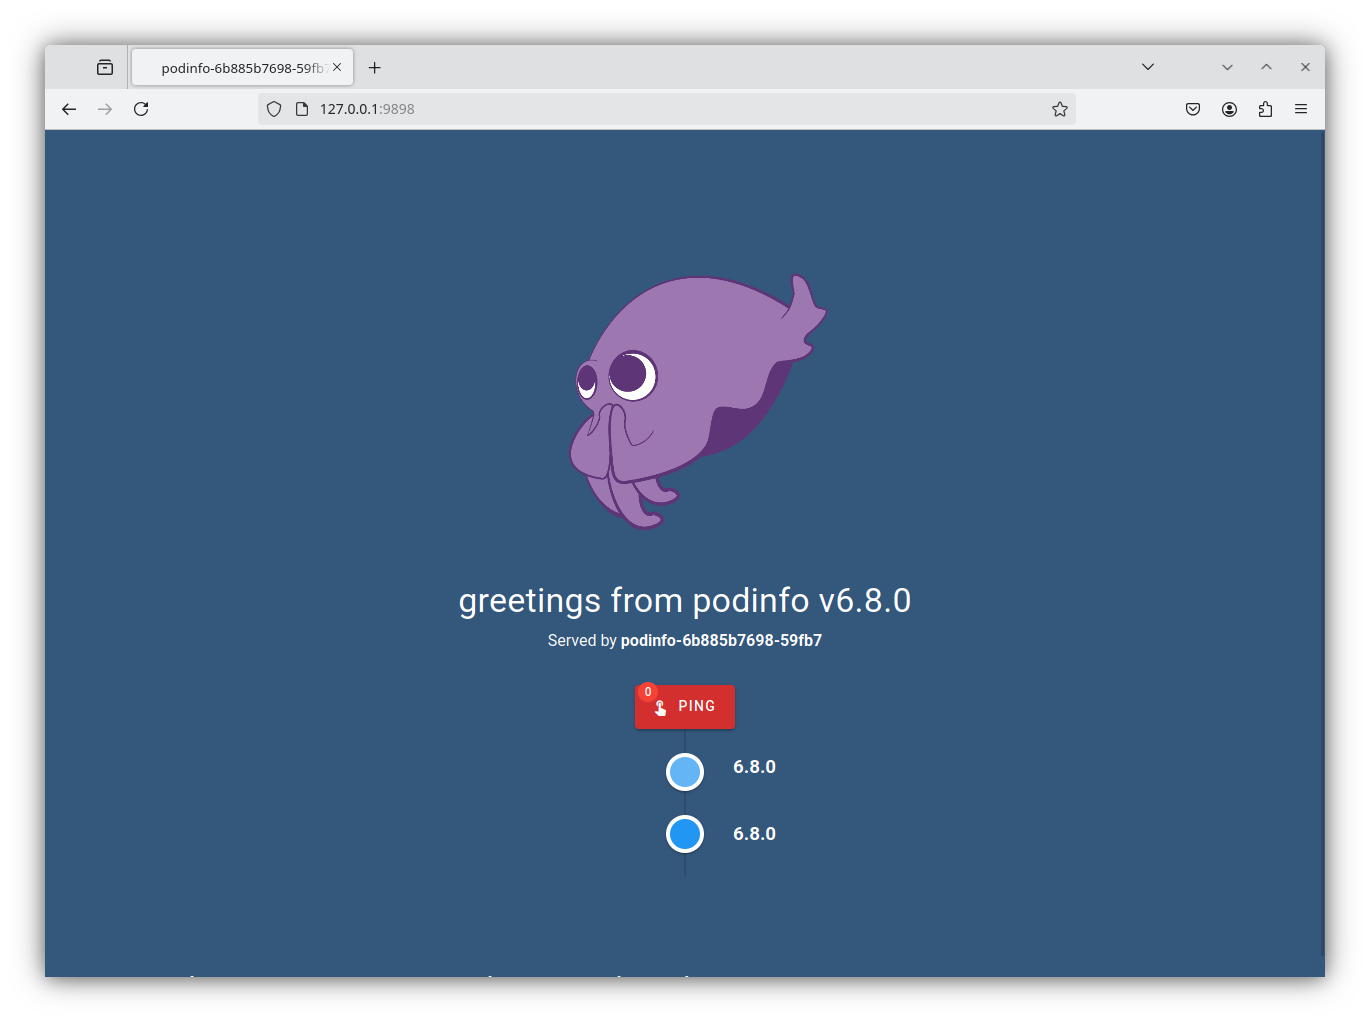
podinfo 6.8.0 False True Helm install succeeded for release podinfo/podinfo.v1 with chart podinfo@6.8.0If the helm chart was deployed successfully, we can use kubectl port-forward to access the web service provided by podinfo. Inspect the services in the podinfo namespace, and then port forward from your admin workstation. This will allow you to access the web page in your browser.
$ kubectl get service -n podinfo
NAME      TYPE        CLUSTER-IP     EXTERNAL-IP   PORT(S)             AGE
podinfo   ClusterIP   172.XX.206.4   <none>        9898/TCP,9999/TCP   63m
$ kubectl port-forward -n podinfo service/podinfo 9898:9898
Forwarding from 127.0.0.1:9898 -> 9898
Forwarding from [::1]:9898 -> 9898
Finally, you can use the flux tree command to inspect the resources and understand how flux applies them:
$ flux tree ks flux-system
Kustomization/flux-system/flux-system
├── CustomResourceDefinition/alerts.notification.toolkit.fluxcd.io
├── CustomResourceDefinition/buckets.source.toolkit.fluxcd.io
├── CustomResourceDefinition/gitrepositories.source.toolkit.fluxcd.io
├── CustomResourceDefinition/helmcharts.source.toolkit.fluxcd.io
├── CustomResourceDefinition/helmreleases.helm.toolkit.fluxcd.io
├── CustomResourceDefinition/helmrepositories.source.toolkit.fluxcd.io
├── CustomResourceDefinition/kustomizations.kustomize.toolkit.fluxcd.io
├── CustomResourceDefinition/ocirepositories.source.toolkit.fluxcd.io
├── CustomResourceDefinition/providers.notification.toolkit.fluxcd.io
├── CustomResourceDefinition/receivers.notification.toolkit.fluxcd.io
├── Namespace/flux-system
├── ResourceQuota/flux-system/critical-pods-flux-system
├── ServiceAccount/flux-system/helm-controller
├── ServiceAccount/flux-system/kustomize-controller
├── ServiceAccount/flux-system/notification-controller
├── ServiceAccount/flux-system/source-controller
├── ClusterRole/crd-controller-flux-system
├── ClusterRole/flux-edit-flux-system
├── ClusterRole/flux-view-flux-system
├── ClusterRoleBinding/cluster-reconciler-flux-system
├── ClusterRoleBinding/crd-controller-flux-system
├── Service/flux-system/notification-controller
├── Service/flux-system/source-controller
├── Service/flux-system/webhook-receiver
├── Deployment/flux-system/helm-controller
├── Deployment/flux-system/kustomize-controller
├── Deployment/flux-system/notification-controller
├── Deployment/flux-system/source-controller
├── Kustomization/flux-system/apps
│   └── Kustomization/flux-system/podinfo
│       ├── Namespace/podinfo
│       └── HelmRelease/podinfo/podinfo
│           ├── Service/podinfo/podinfo
│           └── Deployment/podinfo/podinfo
├── Kustomization/flux-system/config
├── Kustomization/flux-system/infrastructure
├── Kustomization/flux-system/repos
│   ├── HelmRepository/flux-system/podinfo
├── NetworkPolicy/flux-system/allow-egress
├── NetworkPolicy/flux-system/allow-scraping
├── NetworkPolicy/flux-system/allow-webhooks
└── GitRepository/flux-system/flux-system
This view helps me understand the way that kustomizations are applied and why the structure of our repository matters. The flux-system kustomization applies builtin flux components, and then also applies the kustomizations the we wrote to the /clusters/truek8s directory. Those kustomizations then apply other cluster resources, such as the repository, helm release, and namespace resources that make up our podinfo deployment.
My Cluster
I will make my own cluster repository available to supplement this guide. You can view it here: GitHub - TrueK8s. You may think that’s a privacy concern, but in the next guide we’ll discuss why I can do this safely.
Sources
- fluxcd.io: Flux CLI
- fluxcd.io: Get Started with Flux
- fluxcd.io: Flux bootstrap for GitHub
- fluxcd.io: Are there two Kustomization types?
- docs.github.com: Managing your personal access tokens
- github.com: How to structure Flux Kustomizations for single repository? #3801