TrueK8S Part 06
Cloudflare Ingress
When it comes to hosting services, having them available to you inside your house is nice, but the true value comes from having them externally available. I don’t have the risk appetite to expose services directly from my home network, so I let Cloudflare do it for me. This set up is pretty common among homelabbers, and especially among the TrueCharts community from what I’ve seen. I especially like CloudFlare’s Zero Trust services, which allow me to put an extra layer of security in front of my applications by requiring strong authentication before you can access anything.
One way that I’ve noticed my cluster differs from some of the examples I’ve seen in the TrueCharts community is how I chose to configure my external ingress. The most current recommendation I see from the TrueCharts project right now is to run two instances of NGINX ingrex, one internal, and one external. Then, point the Cloudflare tunnel daemon at your external ingress, either from a deployment in your cluster, or from elsewhere on your network.
Personally, I found another project that I find more convenient: STRRL cloudflare-tunnel-ingress-controller. This ingress controller, available as a helm chart, runs a managed Cloudflare tunnel in your environment and provides all the necessary Kubernetes ingress resources.
If you’re following along and don’t have any interest in configuring Cloudflare ingress, skip ahead to part 7. You won’t miss anything.
Deploying cf-tunnel-ingress
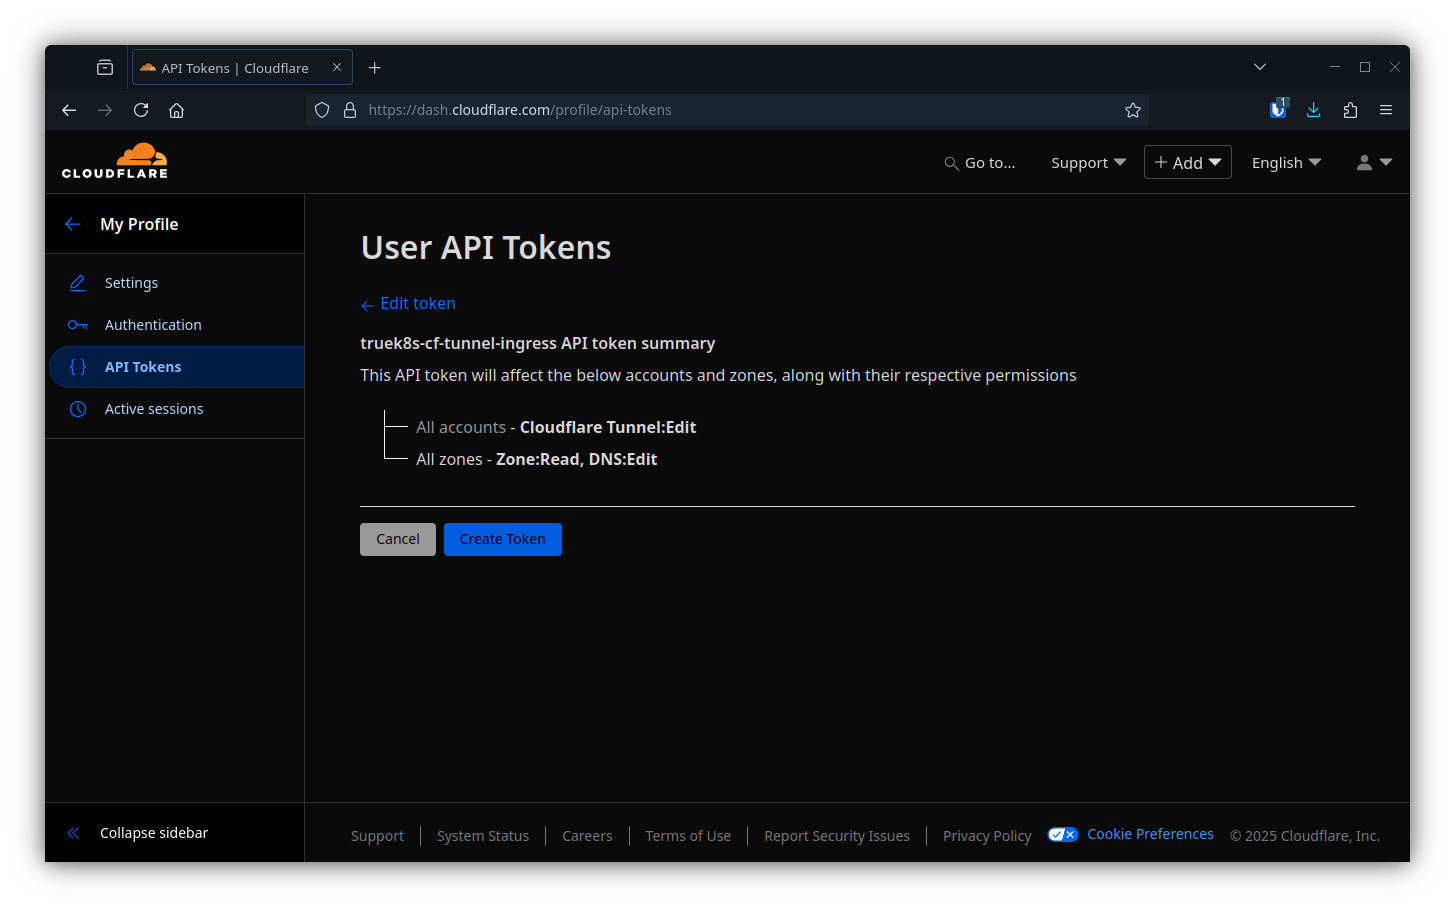
Start by gathering details and generating a unique API token from your Cloudflare account.
- Create custom token
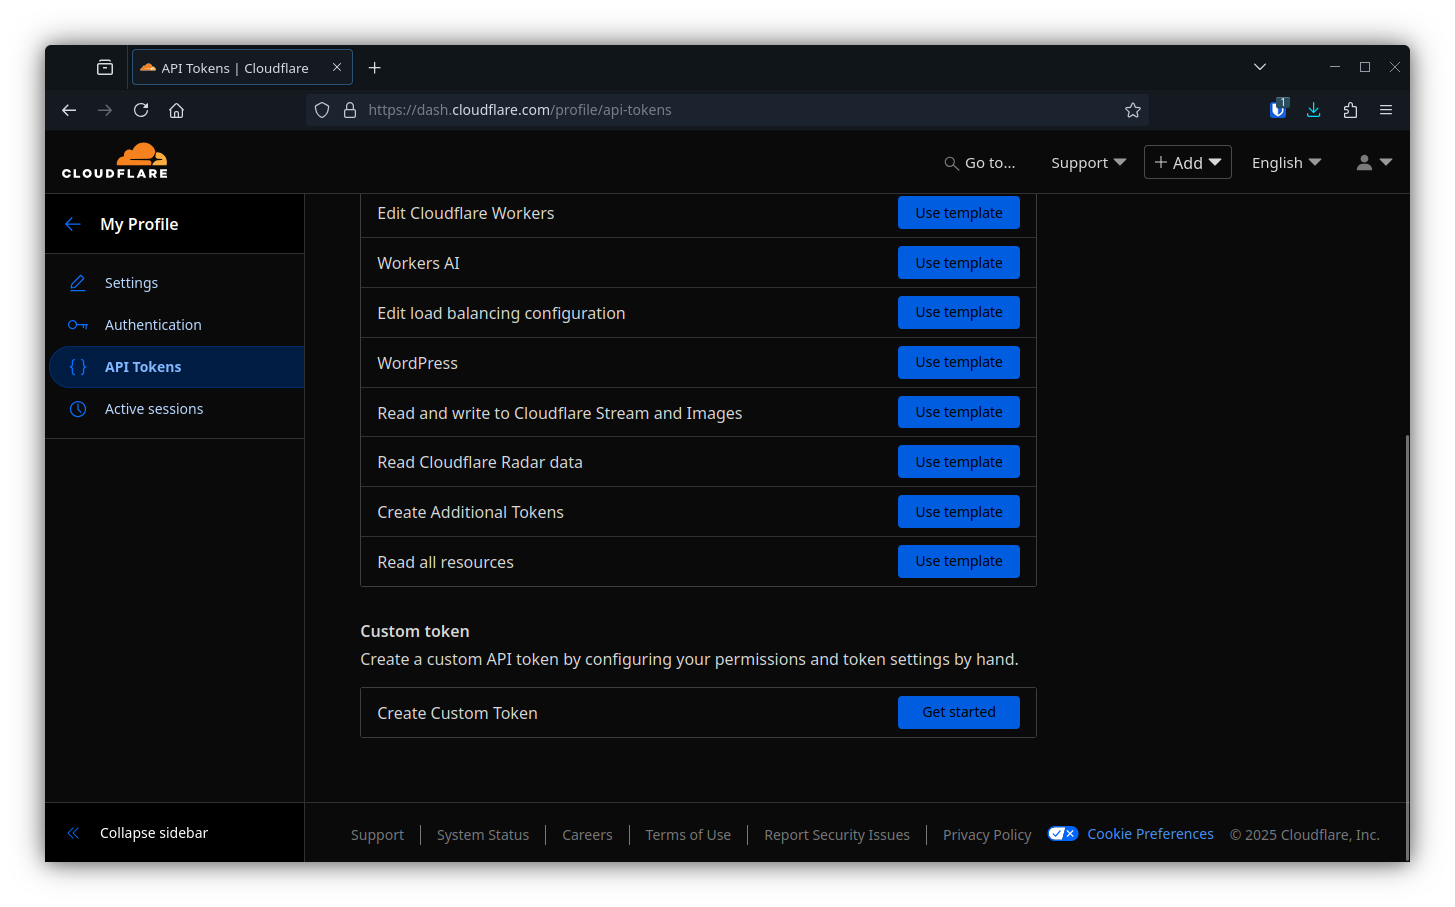
- Add:
- Zone:Zone:Read
- Zone:DNS:Edit
- Account:Cloudflare Tunnel:Edit
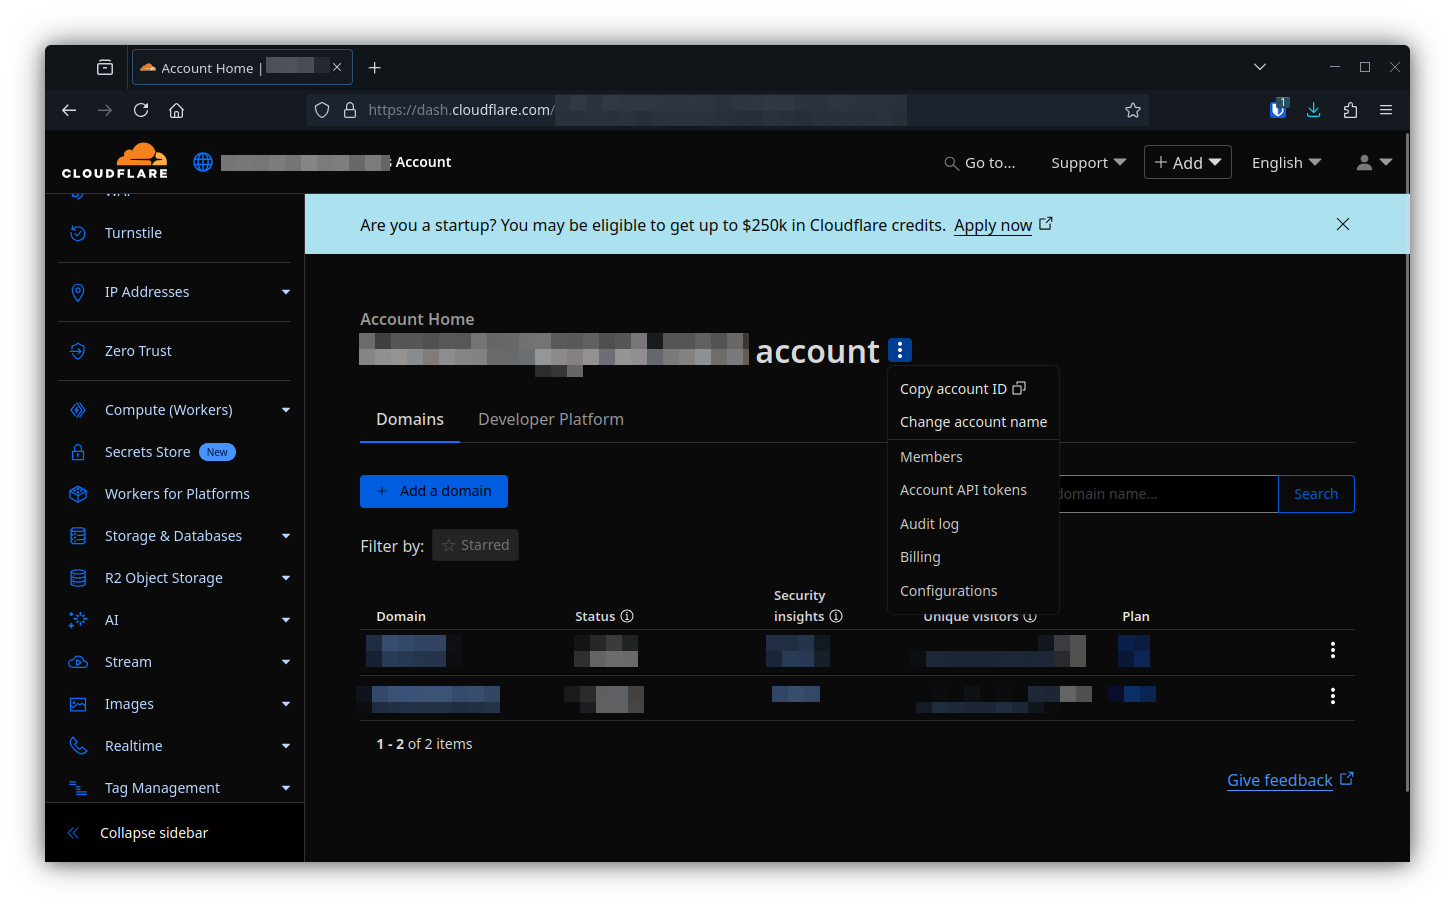
- Then finally, grab your account ID
Then add that info to your cluster-config:
apiVersion: v1
kind: ConfigMap
metadata:
    name: cluster-config
    namespace: flux-system
data:
    CF_INGRESS_ACCOUNT_ID: <your account ID>
    CF_INGRESS_API_TOKEN: <your token>
    CF_INGRESS_TUNNEL: <a descriptive name for your tunnel>
Then deploy the helm chart following the structure of our repo:
truek8s-v2
├── infrastructure
│   ├── core
│   │   └── cf-tunnel-ingress
│   │      ├── helm-release.yaml
│   │      ├── kustomization.yaml
│   │      └── namespace.yaml
│   └── production
│       └── cf-tunnel-ingress.yaml
└── repos
    └── strrl.yaml
infrastructure/core/cf-tunnel-ingress
helm-release.yaml
apiVersion: helm.toolkit.fluxcd.io/v2
kind: HelmRelease
metadata:
  name: cloudflare-tunnel-ingress
  namespace: cloudflare-ingress
spec:
  chart:
    spec:
      chart: cloudflare-tunnel-ingress-controller
      reconcileStrategy: ChartVersion
      sourceRef:
        kind: HelmRepository
        name: strrl
        namespace: flux-system
  values:
    cloudflare:
      accountId: ${CF_INGRESS_ACCOUNT_ID}
      apiToken: ${CF_INGRESS_API_TOKEN}
      tunnelName: ${CF_INGRESS_TUNNEL}
    ingressClass:
      name: cloudflare
      controllerValue: strrl.dev/cloudflare-tunnel-ingress-controller
      isDefaultClass: false
  interval: 1m0s
namespace.yaml
apiVersion: v1
kind: Namespace
metadata:
    name: cloudflare-ingress
kustomization.yaml
apiVersion: kustomize.config.k8s.io/v1beta1
kind: Kustomization
resources:
  - namespace.yaml
  - helm-release.yaml
infrastructure/production
cf-tunnel-ingress.yaml
apiVersion: kustomize.toolkit.fluxcd.io/v1
kind: Kustomization
metadata:
  name: cf-tunnel-ingress
  namespace: flux-system
spec:
  interval: 10m
  path: infrastructure/core/cf-tunnel-ingress
  prune: true
  sourceRef:
    kind: GitRepository
    name: flux-system
repos
strrl.yaml
apiVersion: source.toolkit.fluxcd.io/v1
kind: HelmRepository
metadata:
  name: strrl
  namespace: flux-system
spec:
  interval: 1m0s
  url: https://helm.strrl.dev
And don’t forget to add the new resources to existing kustomizations:
/infrastructure/production/kustomization.yaml
apiVersion: kustomize.config.k8s.io/v1beta1
kind: Kustomization
resources:
  - cert-manager.yaml
  - cluster-issuer.yaml
  - metallb.yaml
  - metallb-config.yaml
  - ingress-nginx.yaml
  - cf-tunnel-ingress.yaml
/repos/kustomization.yaml
apiVersion: kustomize.config.k8s.io/v1beta1
kind: Kustomization
resources:
  - podinfo.yaml
  - jetstack.yaml
  - truecharts.yaml
  - metallb.yaml
  - ingress-nginx.yaml
  - strrl.yaml
Test & Verify
Once the CF-Tunnel helm chart is installed, it will create a new ingress class just like NGINX did. Use kubectl to check for it:
Make sure the ingressclass exists:
$ kubectl get ingressclasses.networking.k8s.io
NAME         CONTROLLER                                       PARAMETERS   AGE
cloudflare   strrl.dev/cloudflare-tunnel-ingress-controller   <none>       8m12s
internal     k8s.io/internal                                  <none>       5d2h
To test it out, you can append an additional ingress definition on apps/general/podinfo/ingress.yaml
apiVersion: networking.k8s.io/v1
kind: Ingress
metadata:
  name: podinfo-nginx
  namespace: podinfo
spec:
  ingressClassName: internal
  rules:
  - host: podinfo.${DOMAIN_0}
    http:
      paths:
      - backend:
          service:
            name: podinfo
            port:
              number: 9898
        path: /
        pathType: Prefix
---
apiVersion: networking.k8s.io/v1
kind: Ingress
metadata:
  name: podinfo-cloudflare
  namespace: podinfo
spec:
  ingressClassName: cloudflare
  rules:
  - host: podinfo.${DOMAIN_0}
    http:
      paths:
      - backend:
          service:
            name: podinfo
            port:
              number: 9898
        path: /
        pathType: Prefix
Commit that and inspect the results:
$ git add -A && git commit -m 'add podinfo cf ingress'
$ git push
$ flux events --watch
inspect any ingress rules create for podinfo:
$ kubectl get ingress -n podinfo
NAME                 CLASS        HOSTS             ADDRESS                                                 PORTS   AGE
podinfo-cloudflare   cloudflare   podinfo.domain.tld   9a6bc2e4-8c73-40a9-b5a3-5ddd0d937f29.cfargotunnel.com   80      29s
podinfo-nginx        internal     podinfo.domain.tld   192.168.XX.200                                         80      5d1h
If everything looks good, test it out by accessing it remotely. When you’re all done, this would be a good time to delete your test deployment - you don’t need to put podinfo on the internet with your name attached to it. Just delete the following files, and remove the podinfo reference from /apps/production/kustomization.yaml
truek8s
├── apps
   ├── general
   │   └── podinfo *
   │       ├── helm-release.yaml *
   │       ├── ingress.yaml *
   │       ├── kustomization.yaml *
   │       └── namespace.yaml *
   └── production
       └── podinfo.yaml *
Zero Trust with Cloudflare.
Exposing services through Cloudflare is only a little bit better than exposing them through your own firewall. To really make things interesting, you should configure Cloudflare Zero Trust rules. That’s not within the scope of what I want to do with this guide, but I would like to cover it in more depth on this blog later.
In my case, I’m hosting Authentik, and use it as an OIDC provider for Cloudflare. I have some custom rules set up to pass authorization access to Cloudflare. Whenever I (or anyone) access one of the apps in my cluster, they first have to provide strong authentication through Cloudflare, which significantly reduces the risk of unauthorized access.
Sources
- Github: strrl cloudflare-tunnel-ingress-controller.
- Cloudflare: find account and zone ids.
- Cloudflare: Zero Trust